
ML Assisted Labeling
When you need to manually label rows for a machine learning classification problem, active learning can optimize the order in which you process the unlabeled data. This capability is provided by the ML-assisted Labeling plugin, which you need to install.
Description
Labeling webapps let you annotate images, sounds, text, and tabular data. For large datasets or with a limited labeling budget, query sampler recipes and a scenario can turn labeling into an iterative active learning process.
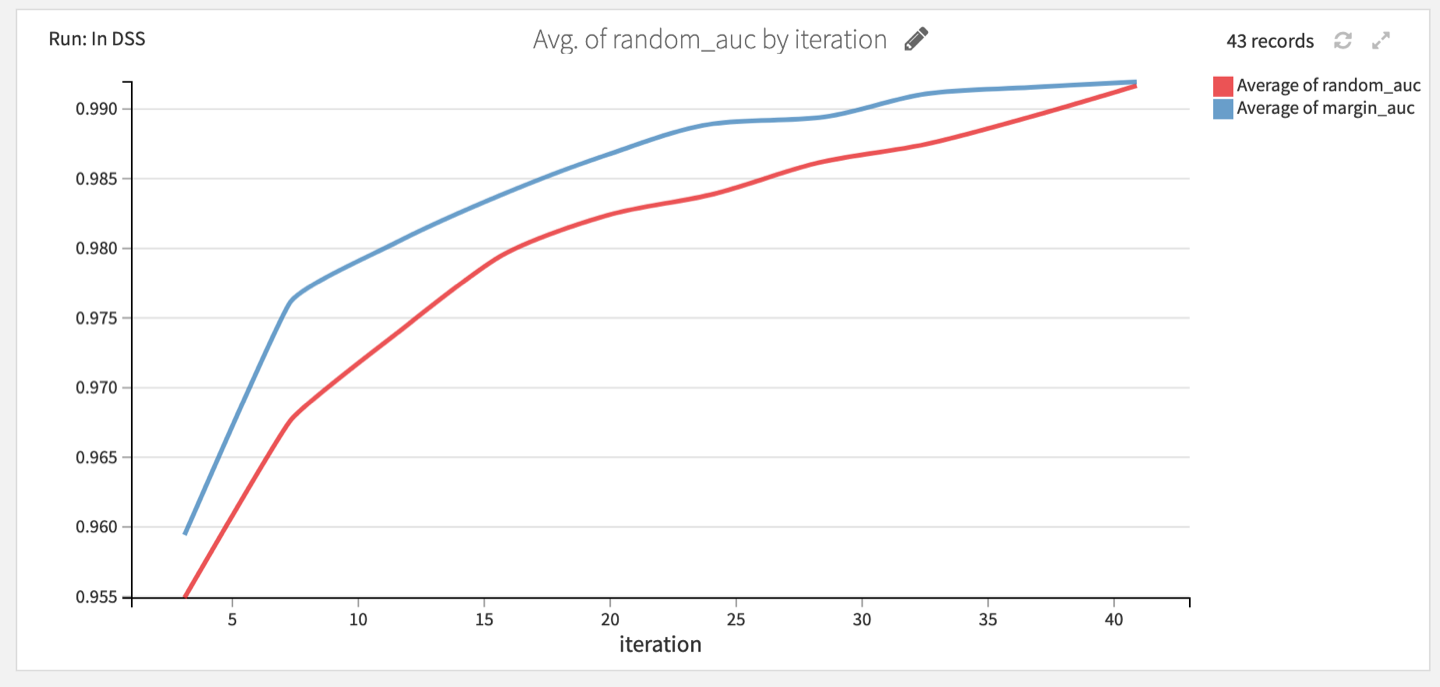
Not all samples bring the same amount of information when it comes to training a model. Labeling a very similar to an already labeled sample might not bring any improvement to the model performance. Active learning aims at estimating how much additional information labeling a sample can bring to a model and select the next sample to label accordingly. As an example, see how active learning performs compare to random sample annotation on a task of predicting wine color:
How to use
Use a visual webapp to label data, a query sampler recipe to select which samples to label next, and a scenario to retrain the model and regenerate queries.
Requirements
For active learning on object detection, also install the Object detection in images plugin (available for CPU and GPU). Its training recipe provides the RetinaNet model weights required by the Object detection query sampler.
Data labeling (Webapp)
Labeling webapps are available for:
Tabular data classification
Images classification
Object detection on images
Sound labeling
Text assisted labelling
Create the webapp
The user can either :
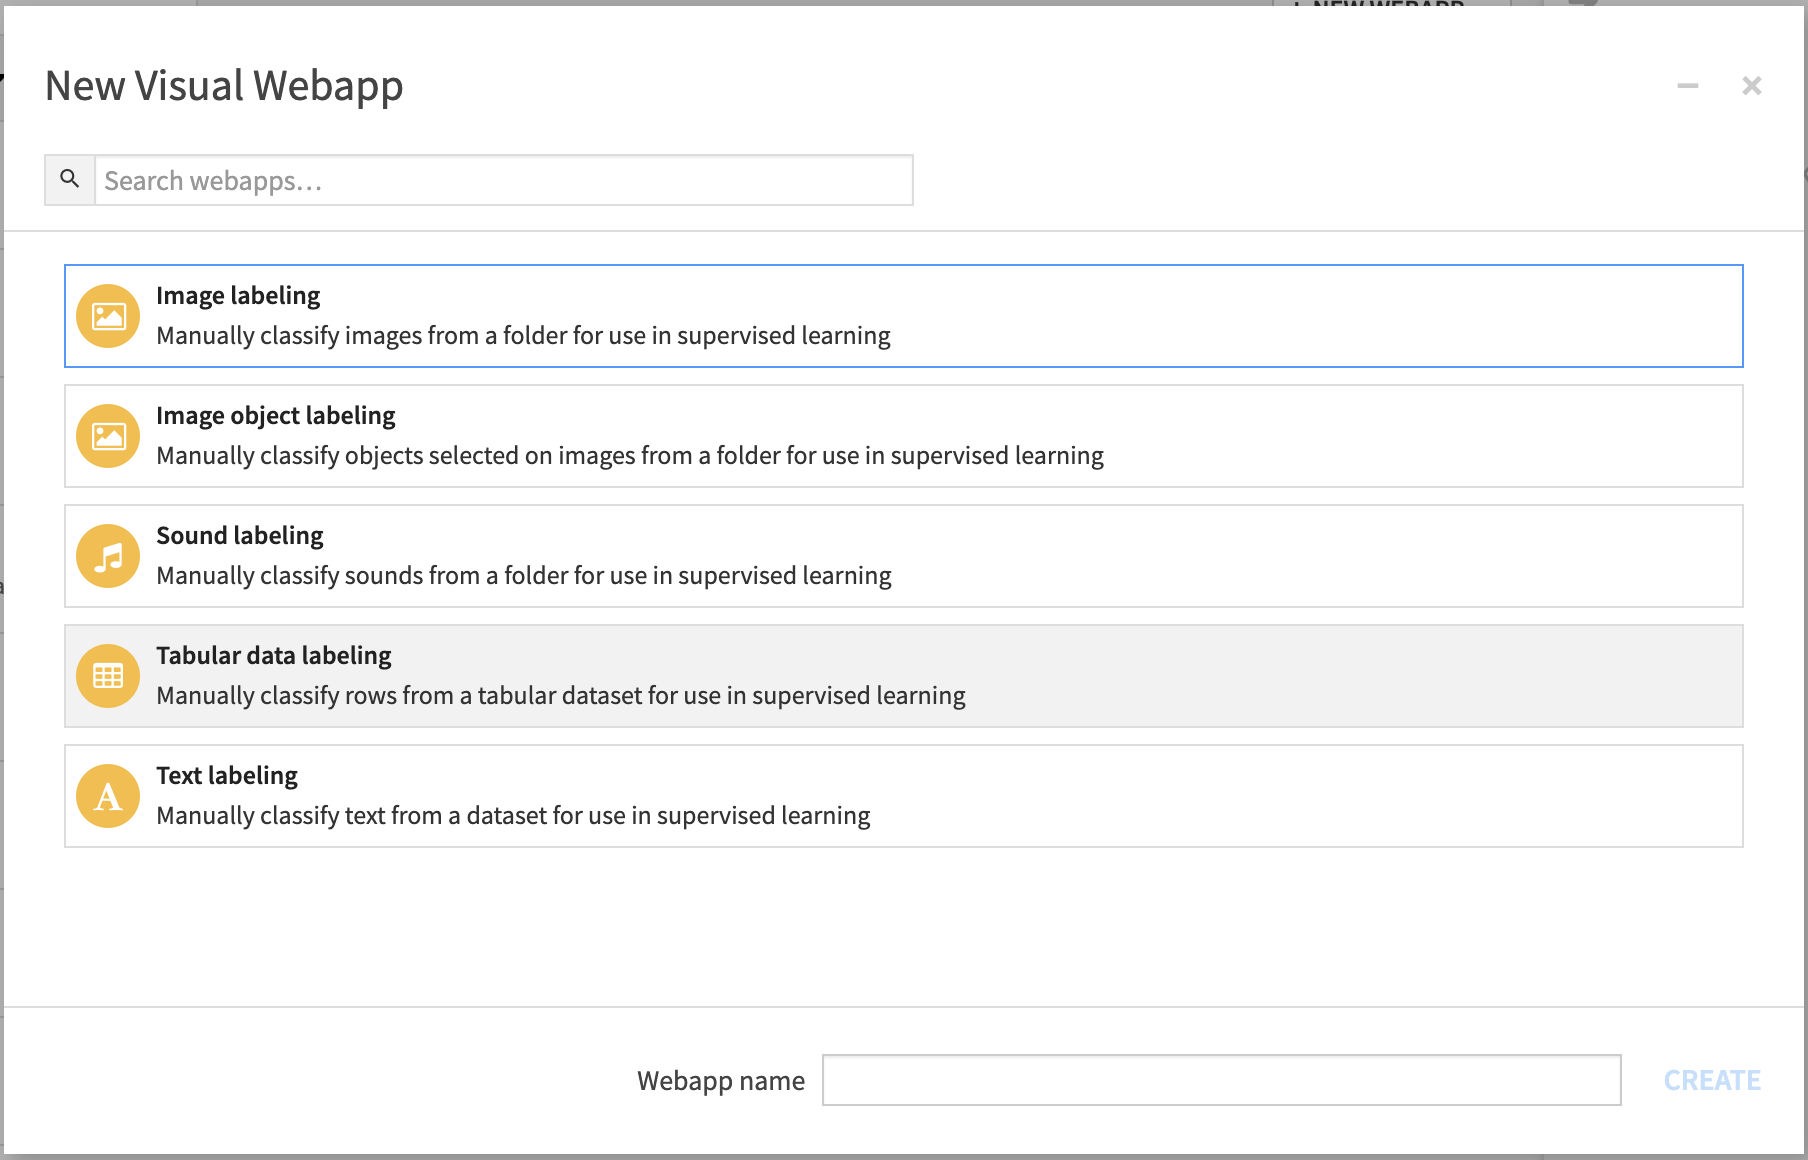
Create a Visual Webapp.
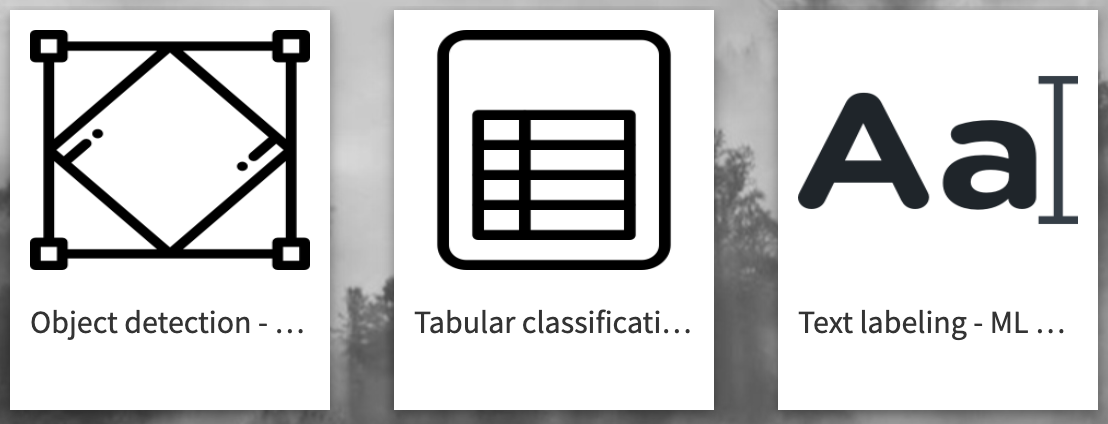
Use the Dataiku Applications.
Configure the webapp
General settings
Choose the input appropriate to the webapp:
Tabular data labeling:
Unlabeled data– dataset containing rows to label.Image labeling and Image object labeling:
Images to label– managed folder containing images.Sound labeling:
Sounds– managed folder containing sound files.Text labeling:
Unlabeled dataset– dataset containing text, andText column– column containing the text to annotate.
All labeling webapps require the following settings:
Categories– labels to assign, with optional descriptions or display text.Labels dataset– dataset to save the labels into. Select or create this dataset before starting the webapp.Labeling metadata dataset– dataset containing labeling status, annotators, timestamps, and comments. Select or create this dataset before starting the webapp.Labels target column name– column under which the manual labels are stored,labelby default.
The tabular, image, object detection, and sound webapps also expose Queries: an optional dataset produced by a query sampler recipe, containing samples and their uncertainty scores. Without queries, labeling remains available but samples are not prioritized by model uncertainty. Text labeling does not expose this setting.
Settings specific for Text Labeling
When you need to label entities in text, you can use the Text labeling webapp. On this webapp, there are some extra parameters that will make your labeling easier and faster.

The available inputs are the following :
Activate Prelabeling– whether you want prelabeling to be activated. Prelabeling will suggest labels on unlabeled data based on what you already labeled. It can highly speed up the process as you won’t have to relabel data that you already assigned. The current prelabeling engine will suggest prelabels based on what you already labeled. For example, if you labeled “John Snow” as a character, the next time you will see “John Snow”, it will be prelabeled as a character.Language– set here the language of the samples you want to label:If all sample share the same language, choose one of the language proposed. If you do not see the language you are looking for, it is not yet supported, try to use the option
Custom...If samples do not share the same language, you can add a column to your dataset containing the language of the sample. Languages must be written using ISO 639-1 language code. Once the column created, select the option
Detected language columnand select the column containing the languages inLanguage column. The codes must identify languages supported by the webapp.If you do not know the languages of sample, you can still select the option
Custom.... It will display two new fields:Text direction– Specifies whether your text is a left-to-right language (Latin, Cyrillic, Greek…) or right-to-left (Arabic, Hebrew, Syriac…).Tokenization– Specifies how you want your text to be split out. Split along white spaces and punctuation for white-space based languages (Latin, Cyrillic, Arabic…) or character when the language does not have any tokenization (Chinese, Japanese…)
Annotation process
After starting the webapp:
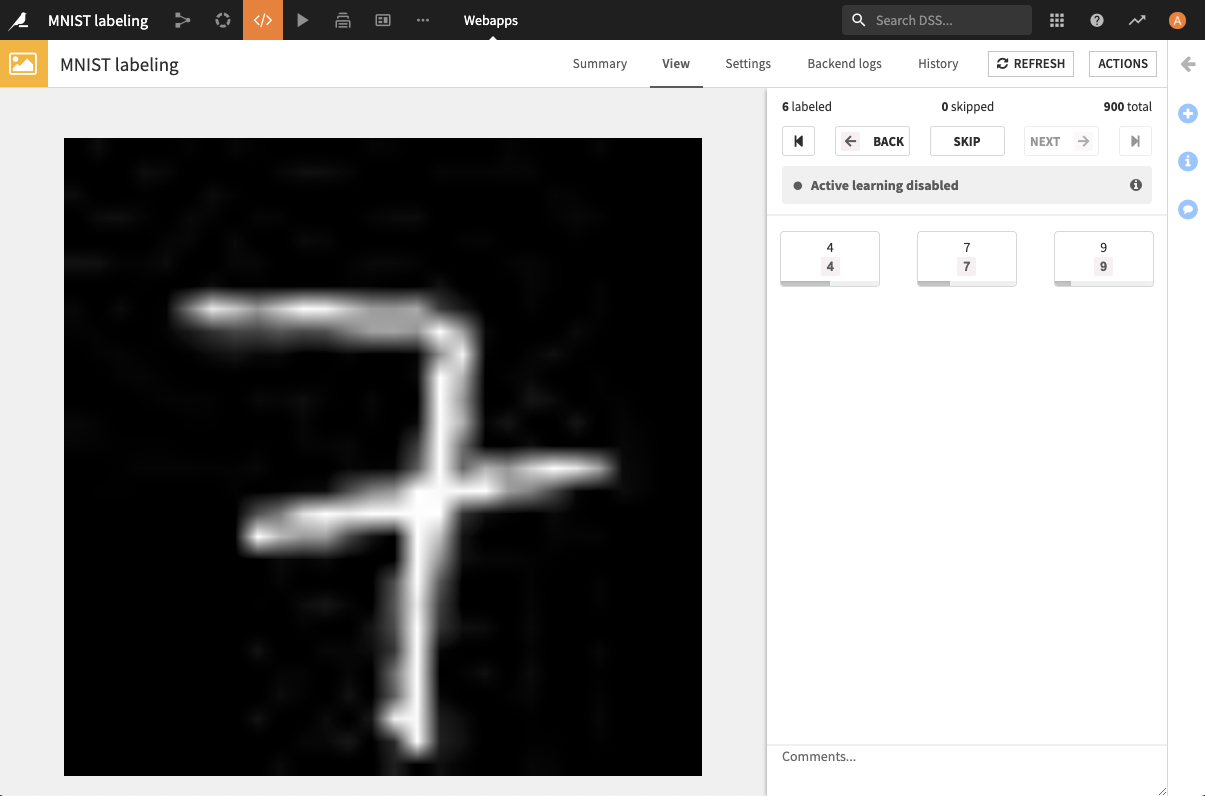
For tabular, image, and sound classification, select a category to save the label and advance to the next sample.
For object detection, select a category and draw a bounding box around each object. Click save & next to save the annotations and advance.
For text labeling, select a category and select a word or group of words. Review any suggested prelabels, then click save & next to save the annotations and advance.
Use skip to move past a sample without labeling it. Use back or first to revisit previous annotations; save changes to object or text annotations with save & next.
The labels dataset retains the input columns for tabular and text data, or contains a path column for folder-based inputs. The webapp adds the label column and an annotation ID column named after it, label_id by default. Exclude the annotation ID column from model features.
For more details on the annotation WebApp, refer to the documentation.
Active Learning Recipe
When a sufficient number of samples has been labeled, a classifier from the Dataiku Visual Machine Learning interface can be trained to predict the labels, and be deployed in the project’s Flow. Use a Python 3 environment to train the classifier.
How to do Active Learning
Basically, here are the steps to do Active Learning :
Train a classifier model on your already labeled dataset and deploy it to the Flow.
Thanks to the model you’ve just trained, get the uncertainty level for sample to label, using the Query Sampler recipe (+ Recipe > ML-assisted Labeling > Query sampler)
Use the output dataset of the Query Sampler recipe in the
Queriesparameter of your Labeling Webapp. The samples with the higher uncertainty level will be displayed first in the Webapp.
For Active Learning on classification problem (on label per sample), you can use the following tutorial.
For object detection, train a RetinaNet model with the Object detection in images plugin and use the Object detection query sampler described below. See the object detection tutorial.
Note
Active Learning is not available for Text Labeling.
Details on the Query Sampler methods
The Query sampler recipe requires these inputs:
Classifier Model– deployed classifier model.Unlabeled Data– dataset containing the raw unlabeled data, or a managed folder containing the files to label.
Select an output dataset under Data to be labeled. For dataset inputs, the output retains the input columns and adds uncertainty. For folder inputs, it contains path and uncertainty.
Choose a Query sampling strategy from the methods below. When GPU controls are available for the model and environment, you can also configure:
Use GPU– enable GPU execution.List of GPUs to use– comma-separated GPU indexes, shown whenUse GPUis enabled.Memory allocation rate per GPU– fraction of each GPU’s memory to allocate, between 0 and 1, shown whenUse GPUis enabled.
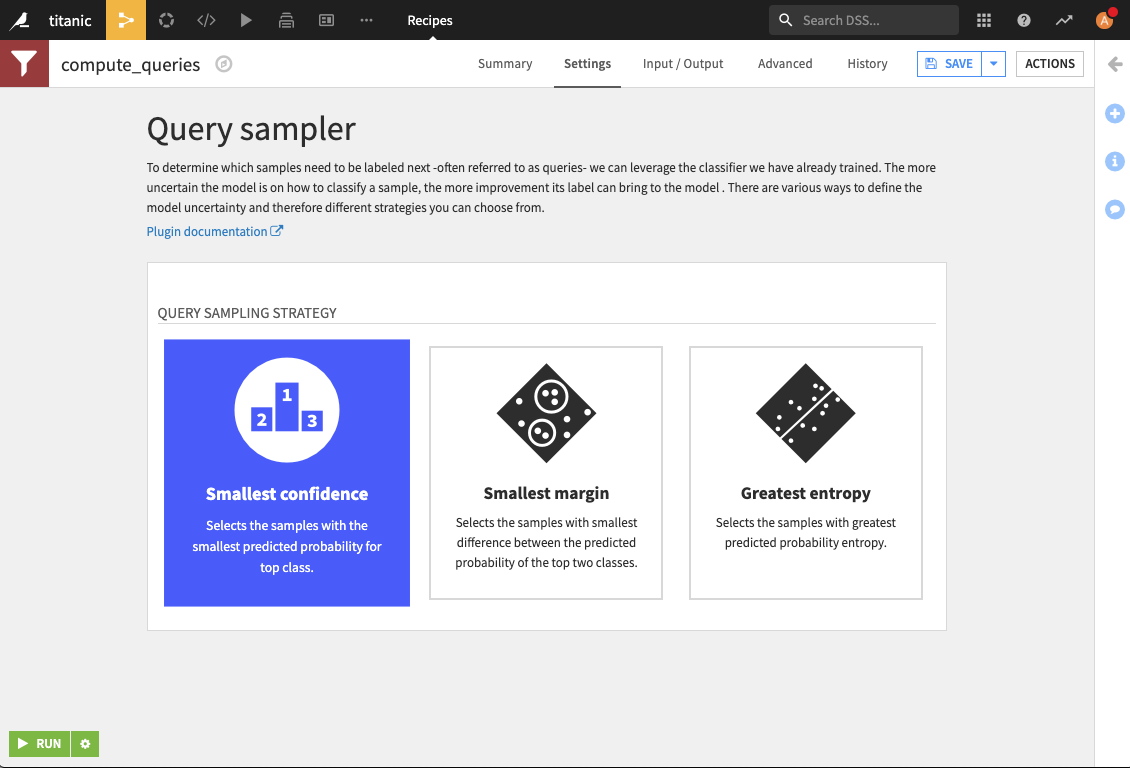
The available strategies are Smallest confidence, Smallest margin, and Greatest entropy.
Note
In the binary classification case, the ranking generated by all the different strategies will be the same.
In that case, one should therefore go with the Smallest confidence strategy that is the less computationally costly.
Smallest confidence
Selects samples with the smallest predicted probability for the most probable class.
Smallest margin
Selects samples with the smallest difference between the top two predicted class probabilities.
Greatest Entropy
Selects samples with the greatest Shannon entropy across predicted class probabilities. The output score is not normalized to 0–1; its maximum is the natural logarithm of the number of classes.
Sessions
Each query sampler run increments a session counter stored in the project’s variables for its queries dataset. The labeling webapp records this counter in the session column of the labeling metadata dataset; it is not added as a column in the queries dataset.
Object detection query sampler
The Object detection query sampler uses the following inputs:
Managed folder with model weights– folder generated by the Object detection in images plugin’s training recipe, containing RetinaNet weights and labels.Unlabeled Images– managed folder containing the images to label.
Both folders must be accessible on the DSS server’s local filesystem. Select an output dataset under Queries dataset; it contains path and uncertainty. Use this dataset in the Queries setting of the Image object labeling webapp.
The recipe exposes the same query sampling strategies and conditional GPU controls described above, plus:
Batch size– maximum number of images processed together, 1 by default.Confidence– value between 0 and 1, 0.5 by default. In version 4.1.1, changing this setting does not affect prediction filtering.
Active Learning Scenario
The Active Learning process is instrisically a loop in which the samples labeled so far and the trained classifier are leveraged to select the next batch of samples to be labeled. This loop takes place in Dataiku through the webapp, that takes the queries to fill the training data of the model, and a scenario that regularly trains the model and generates new queries.
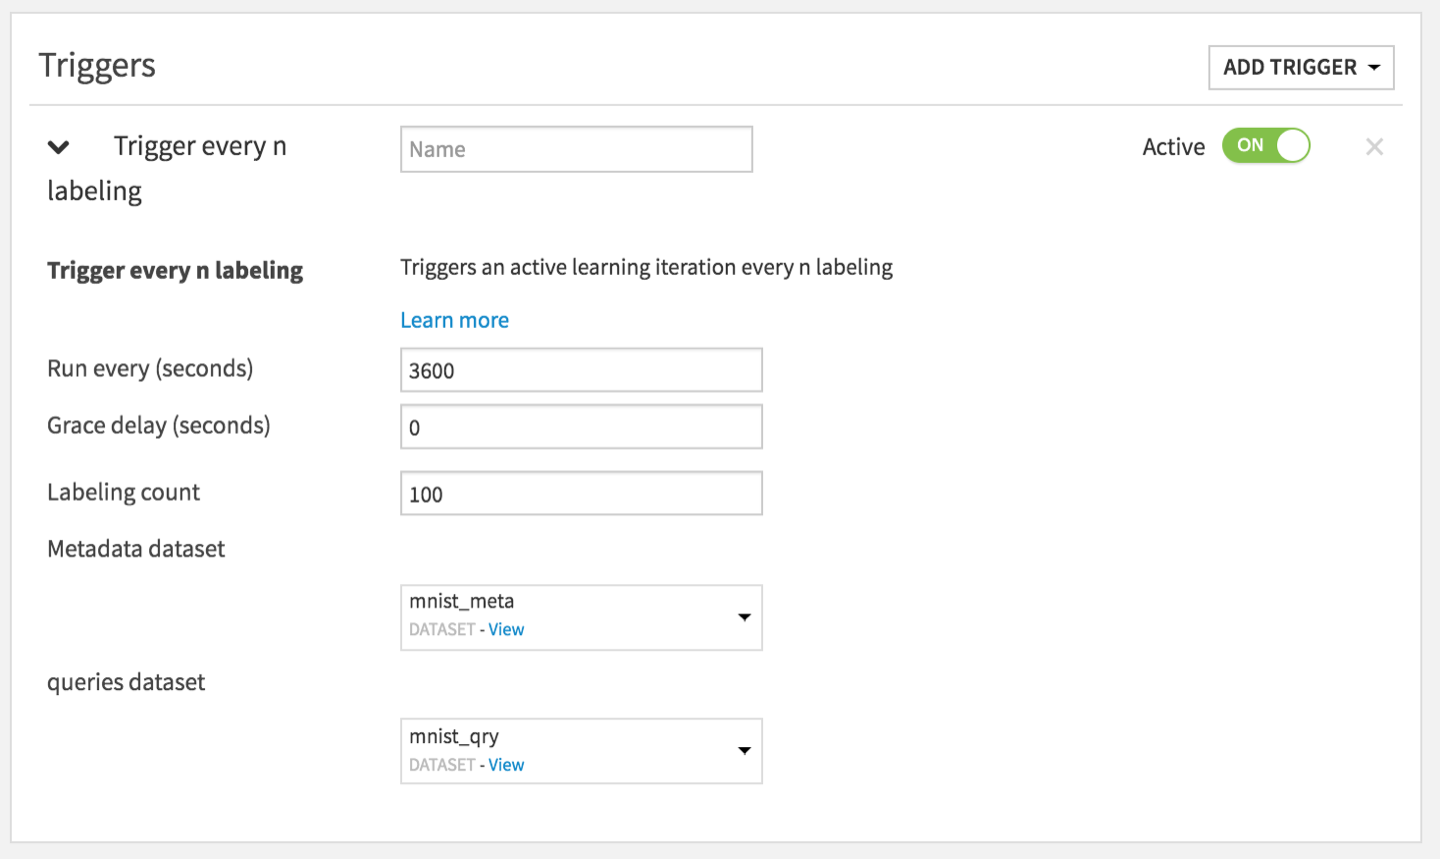
Create a scenario and add the custom trigger Trigger every n labeling. Configure:
Labeling count– number of recorded samples needed to trigger an iteration, 100 by default. Skipped samples also count.Metadata dataset– labeling metadata dataset used by the webapp.Queries dataset– output dataset of the query sampler used by the webapp.
With a nonempty queries dataset, the trigger counts metadata records for the current session and fires when the count reaches the threshold. With an empty queries dataset, it fires when the total number of metadata records exceeds the threshold.
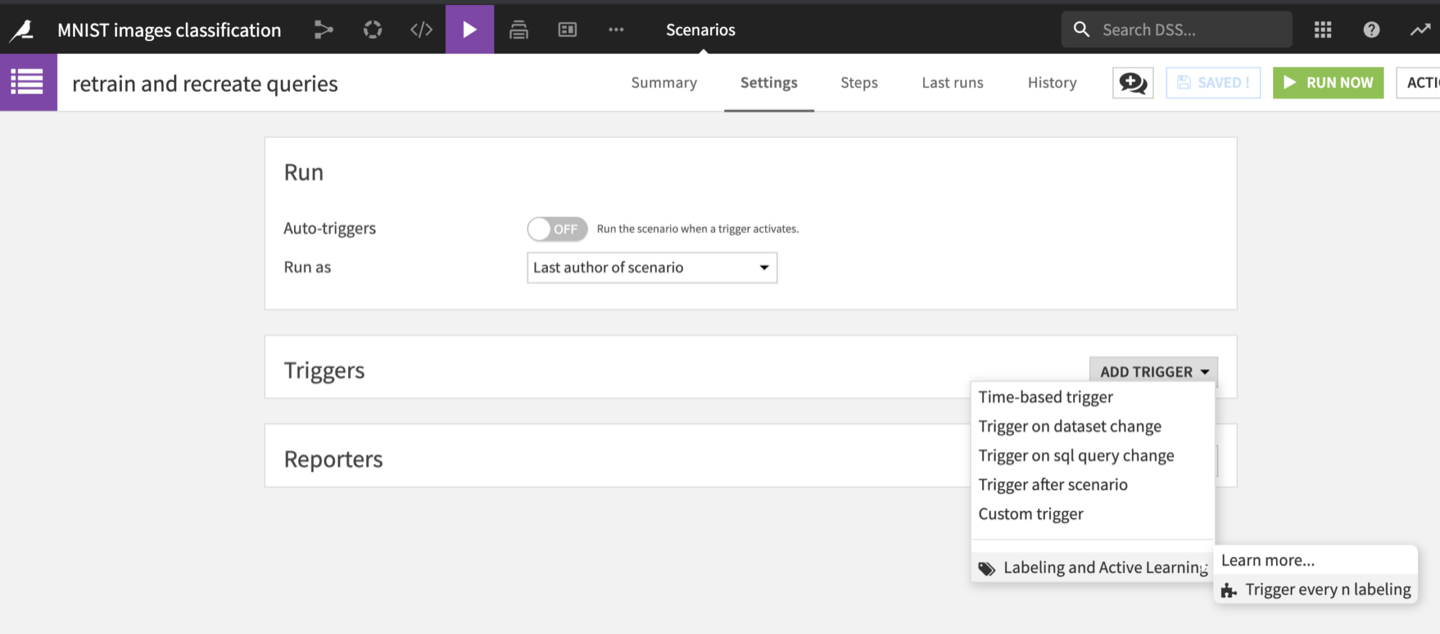
The following is then displayed:
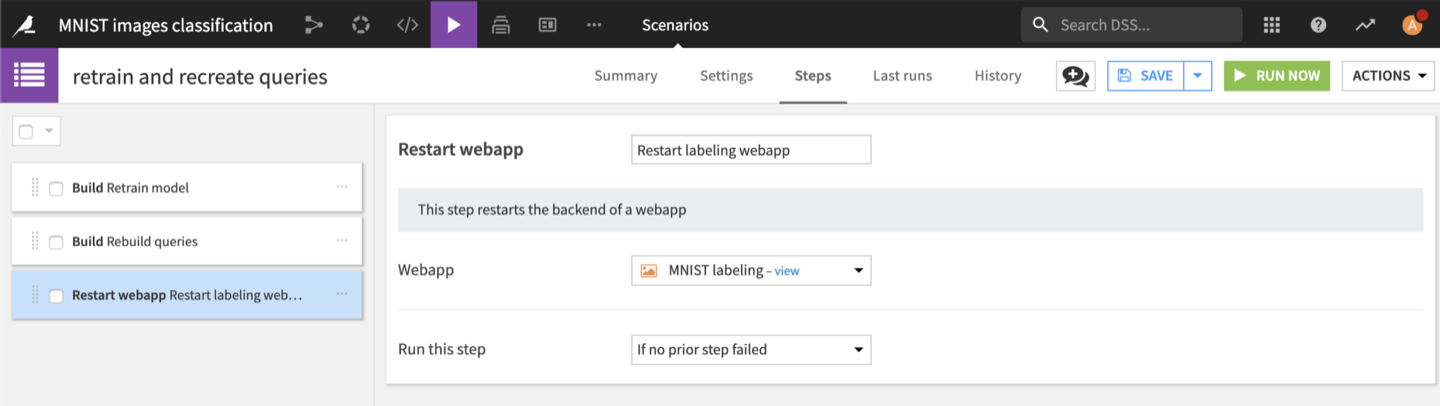
Add the following scenario steps in order:
Build the model to retrain it on the labels collected so far.
Build the queries dataset to run the query sampler with the updated model.
Restart the labeling webapp’s backend so it loads the new queries and session.
Compute labeling metrics
The Compute labeling metrics custom scenario step compares predictions from classifier versions on unlabeled samples and records their disagreement rate and the latest model’s AUC. These metrics provide stopping guidance in the labeling webapp. Add this step after retraining the classifier and before restarting the webapp.
Configure the following settings:
Deployed model– saved classifier model to evaluate.Type of unlabeled input– chooseDatasetorFolder.Unlabeled datasetorUnlabeled folder– input containing the samples to evaluate, according to the selected input type.Metadata dataset– labeling metadata dataset used by the webapp.Number of samples– requested evaluation sample count, 1000 by default.Use GPU– enable GPU execution. When enabled, setList of GPUs to useto comma-separated GPU indexes andMemory allocation rate per GPUto the fraction of each GPU’s memory to allocate, between 0 and 1.
The step requires at least two classifier versions. After metrics have been recorded, it skips computation until the latest model has been trained on at least 20 more samples than the last evaluated model. This step uses a saved classifier; it does not accept the RetinaNet weights folder used by the object detection query sampler.
Reformat image annotations recipe for Dataiku Computer vision
Use this recipe to reformat your dataset and make it compatible with Dataiku computer vision (available from Dataiku 10.0).
How to use
Select the labels dataset produced by the Image object labeling webapp in the Flow. Click + RECIPE > ML-assisted Labeling > Reformat image annotations, select an output dataset, and choose the annotation column to convert.
Input
Input Dataset – dataset containing image paths and object detection annotations from the labeling webapp.
Output
Output Dataset – dataset retaining the input rows and columns, with the selected annotation column converted to DSS computer vision format. Each annotation contains bbox coordinates and a category. Missing annotations are converted to empty lists. The recipe retains the existing column names, including the image path column.
Settings
Target column – required column containing the annotations to convert, label by default.