
Navigation in Dataiku Govern
Dataiku Govern’s interface is organized into two main navigation areas: the main navigation menu and the Application menu.
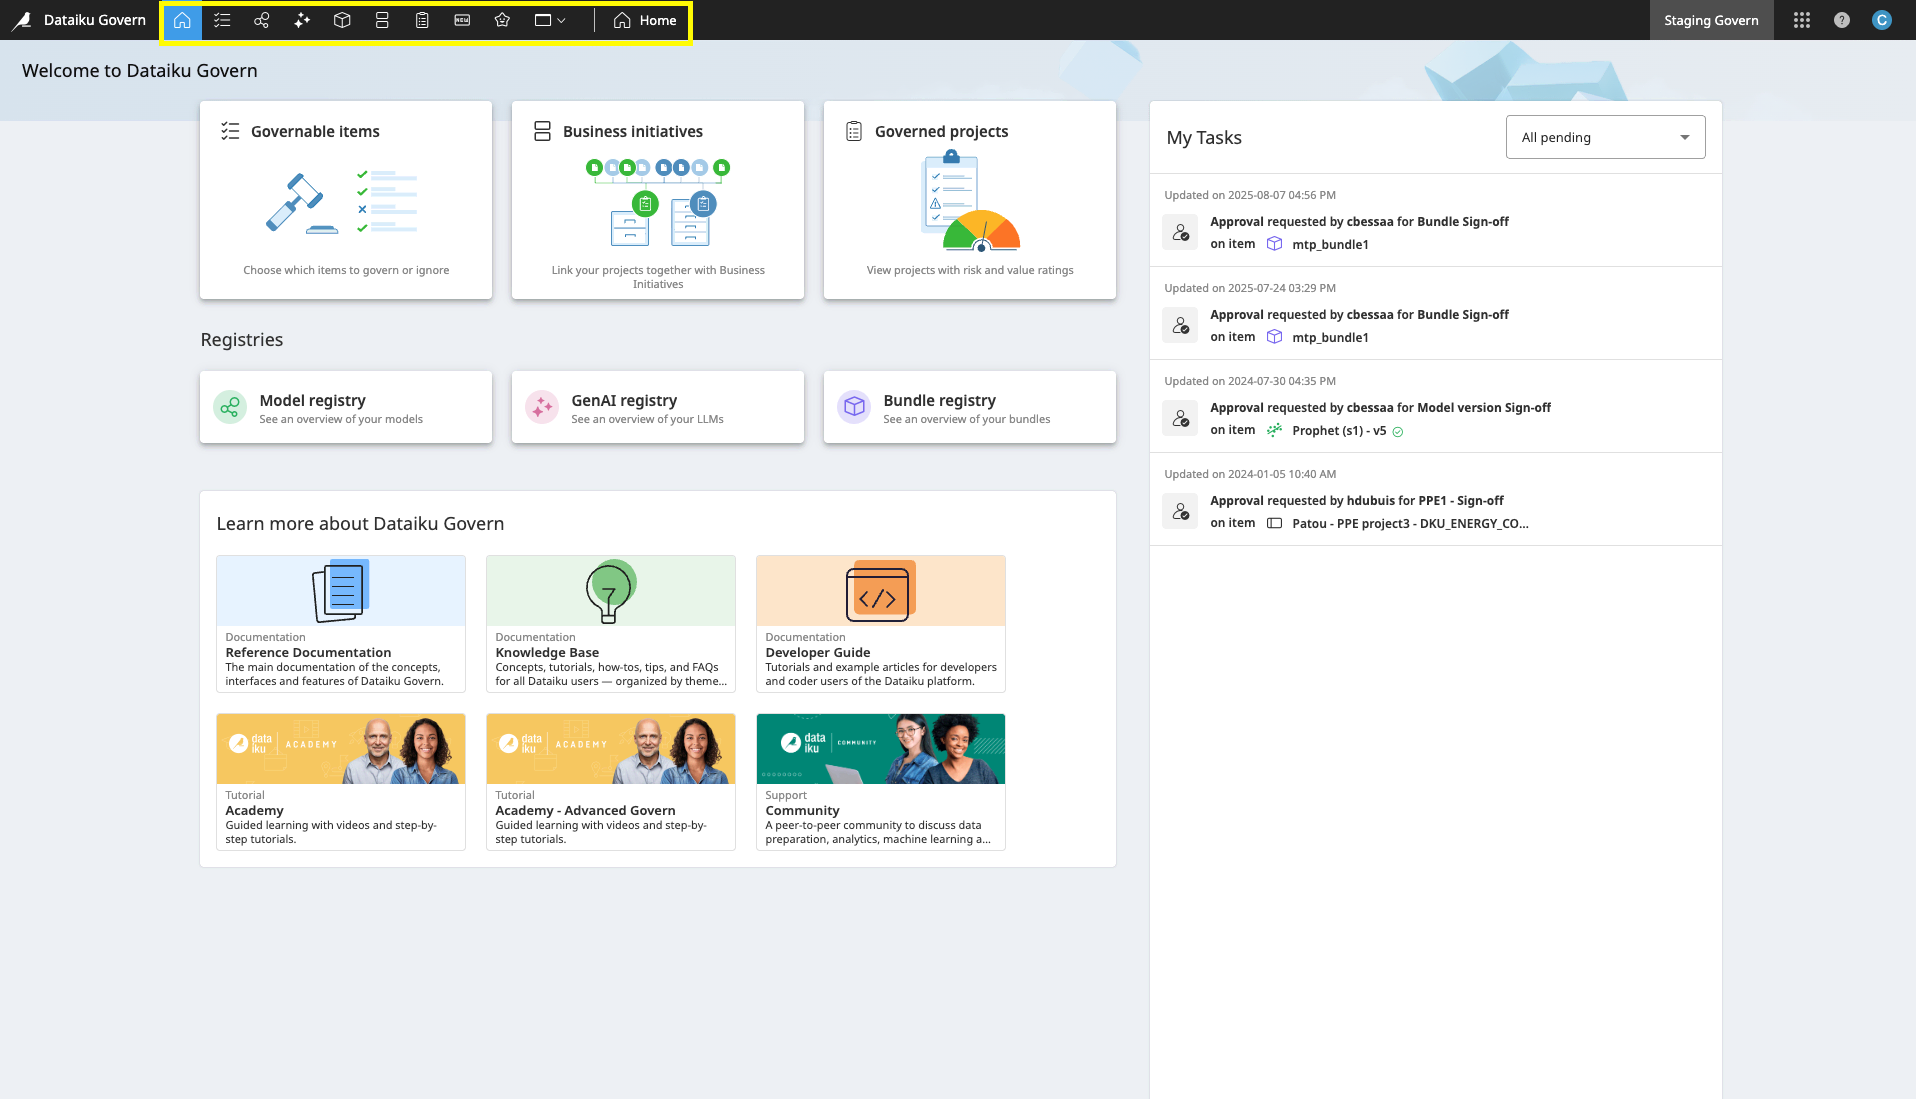
Pages from the top navigation bar
Pages from the top navigation bar are the main working spaces where all synced and governed items are organized. All of these pages feature a table that can display items as a flat list, grouped by type, or with hierarchical relationships.
Standard Dataiku Govern pages
The Home page is the main landing page, offering a quick overview of your review tasks and access to essential resources.
Learn more about Dataiku Govern: This section contains direct links to Reference Documentation, Knowledge Base, Developer Guide, Academy, and the Community websites.
AI Governance Solutions: This section contains direct links to EU AI Act Compliance Readiness, Streamlined GxP Workflows and Model Risk Management solutions.
The Governable items page acts as an inbox for all synced items that have not been governed yet, highlighting what needs your attention.
The Model registry page is a central repository for a hierarchical, project-based view of your models. Here, you can review model status, performance, and deployment metrics, track input drift, and see whether a model is governed and its current state (e.g., in production, waiting for approval, etc.).
The GenAI registry page is a central repository for a hierarchical, project-based view of your generative AI assets. This includes fine-tuned LLMs, Agents, and Augmented LLMs, each with their respective versions.
The Bundle registry page is a central repository that provides a hierarchical, project-based view of your bundles. Here you can easily review their status, track whether a bundle is governed and its current state (e.g., in production, waiting for approval), and drill down for more detailed information.
The Business initiatives page provides a comprehensive list of your organization’s business initiatives. In addition to the Matrix view, it also offers Kanban view for flexible visualization, management, and monitoring.
The Governed projects page is a list of all projects that have been officially brought under governance. For flexible visualization and monitoring, the page can be displayed in both a Matrix and a Kanban view.
Views of pages
Filters
Tables can be filtered with the page header. In addition to the pre-defined filters that you can use, there is an option  to refine your results further. Using the filter button, you can define logical operations and conditions to meet your requirements. The conditions you create can filter field values, workflow steps, sign-off statuses, and more.
Access to additional metadata
A right-hand panel on every page shows both synced and governance metadata. Depending on the item selected in the table or card you will be able to see the metadata linked to the item.
Pages from the waffle menu
The waffle menu provides access to history, design and core administrative functions.
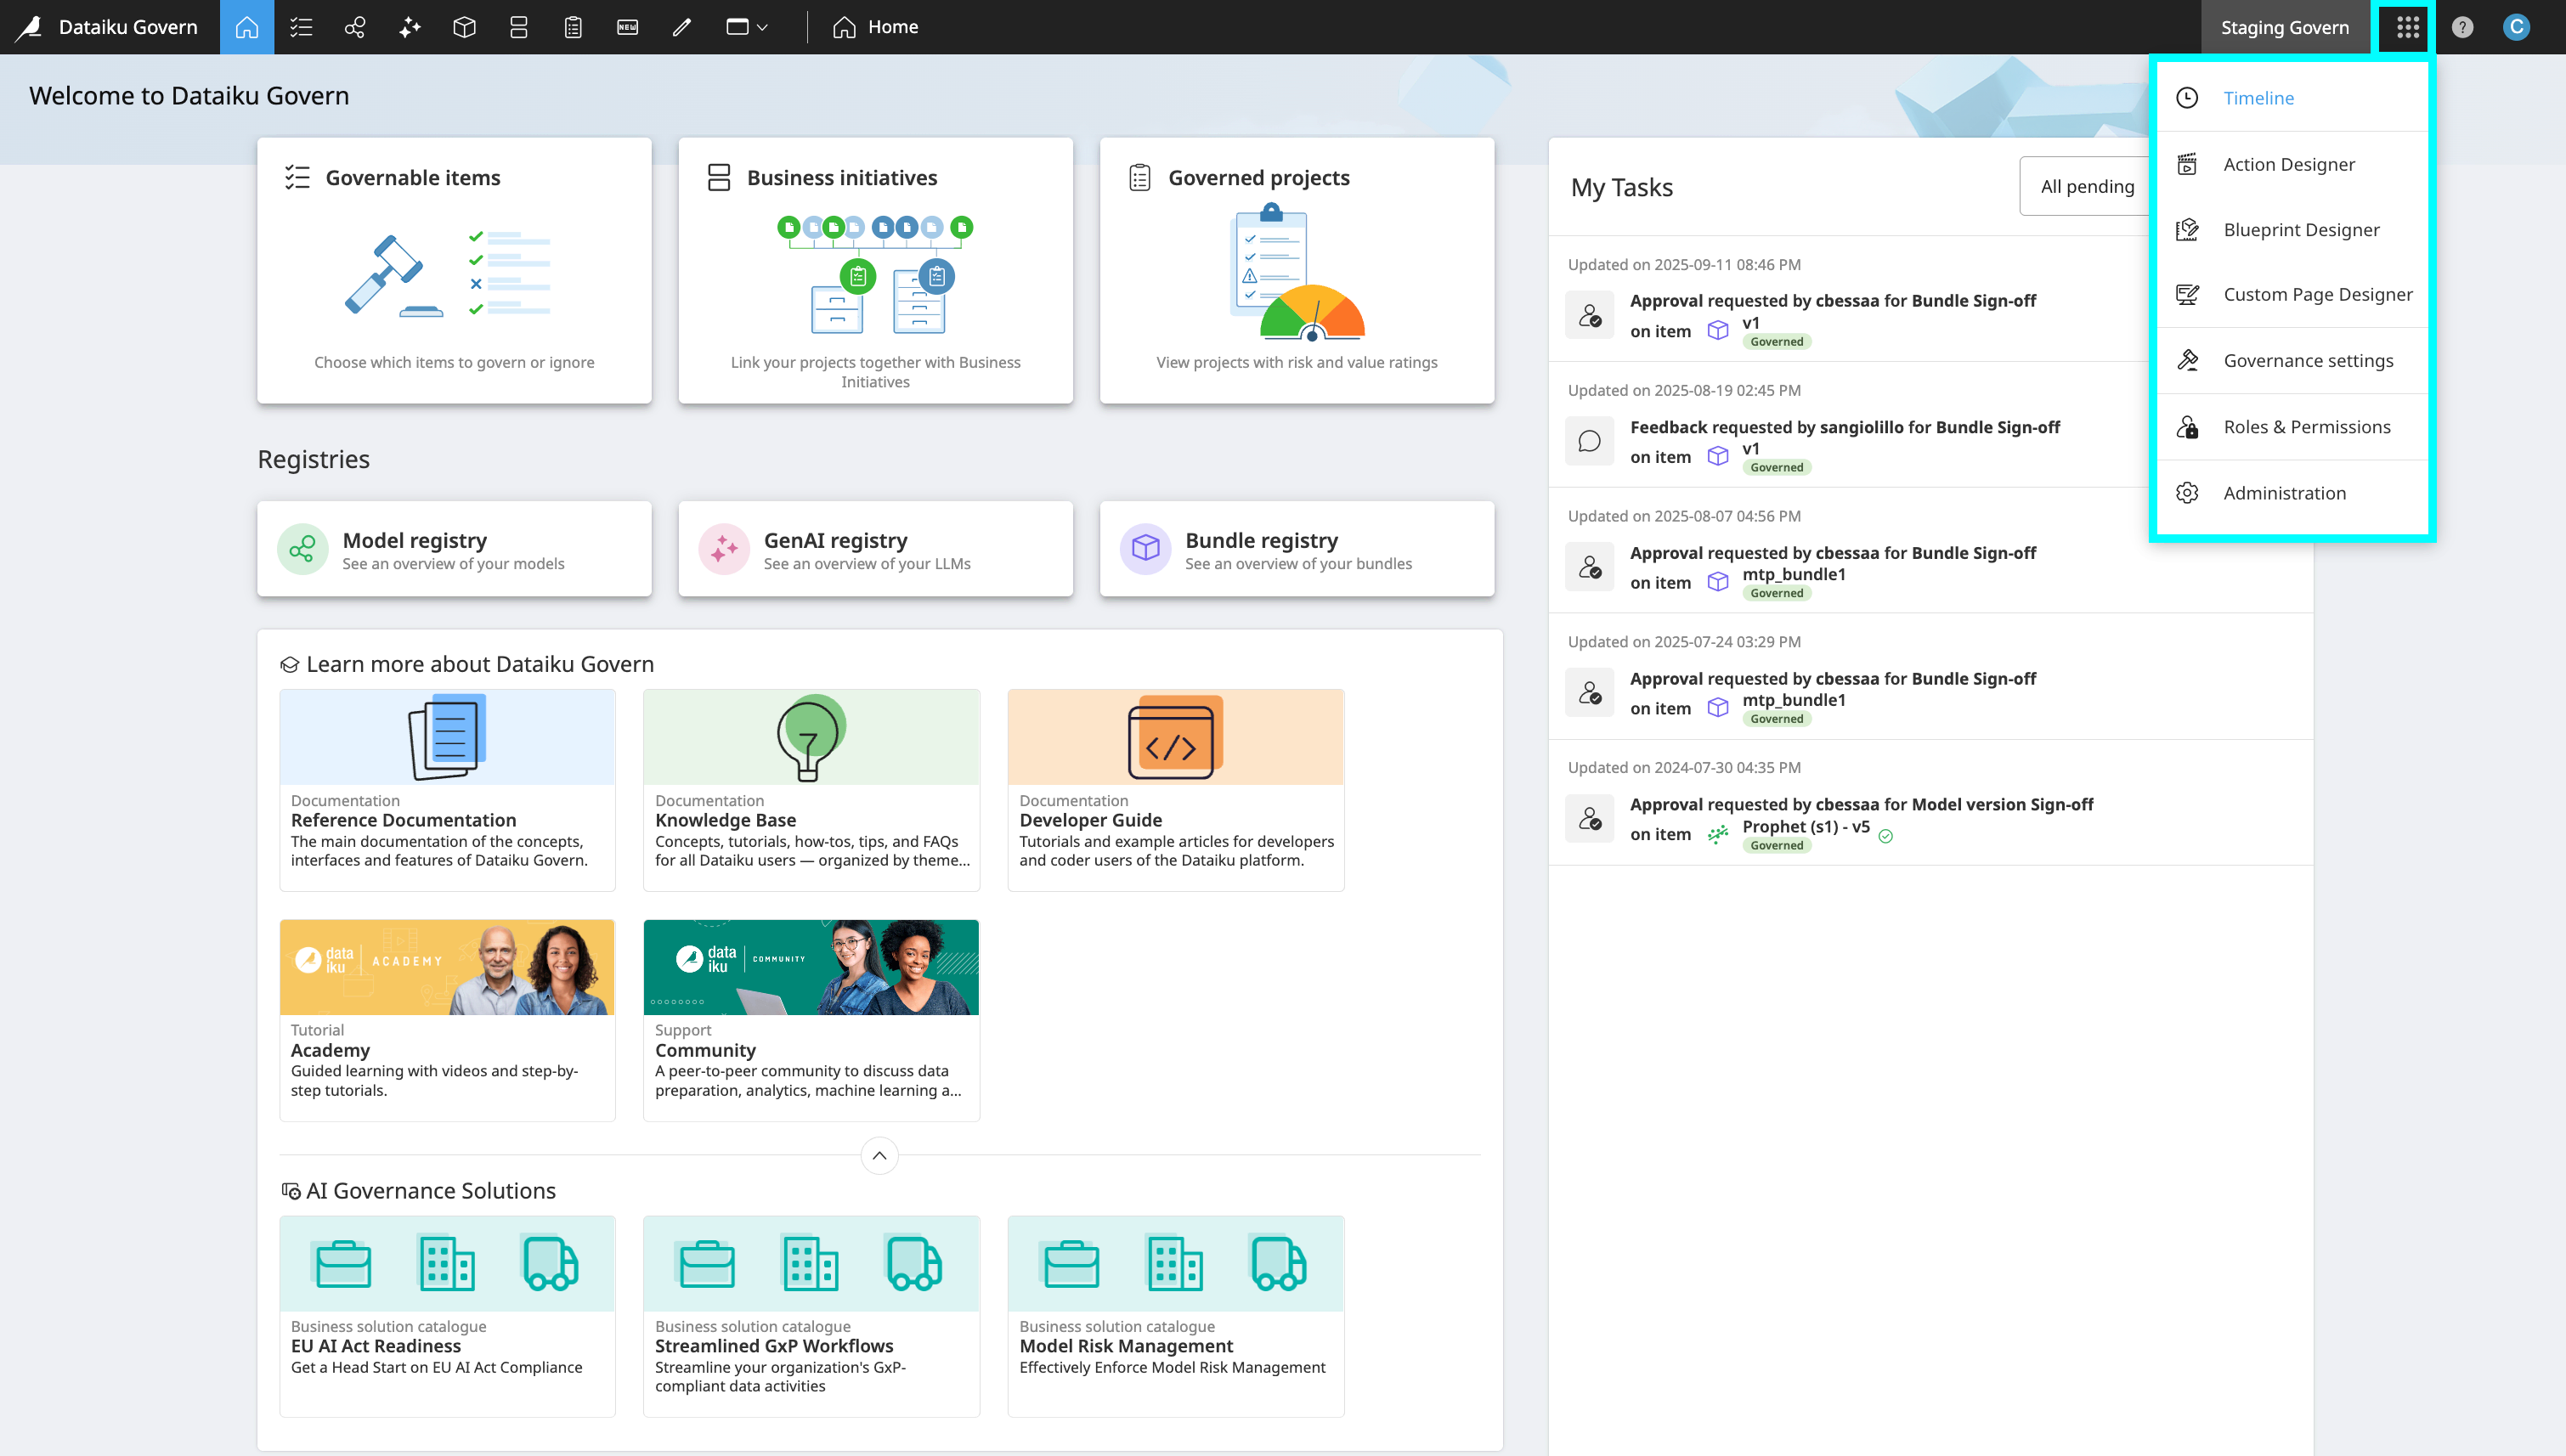
Access your Govern instance history
The Timeline page is a centralized hub for viewing a history of all item-related events, including creations, updates, and deletions.
Customize your governance processes
The Action Designer page allows you to create custom actions displayed as buttons within custom pages.
The Blueprint Designer page allows you to create custom governance templates.
The Custom Pages Designer page allows you to create custom pages for the instance.
Security and governance policies configurations
The Governance Settings page allows you to configure your instance’s specific governance policies.
The Roles and Permissions page allows you to define and manage user access rights for specific items.
The Administration page helps you to manage core system functions. This includes security, logs, user setup, authentication, and notifications.