
Deployment infrastructures
The Project Deployer manages several deployment infrastructures, which are Automation nodes. You need to create at least one in order to deploy projects.
Creating Automation nodes
Custom Dataiku
You will need to install one or several Automation nodes. Please see Installing an automation node.
Then for each Automation node, go to Administration > Security > Global API keys and generate a new API key. This key must have global admin privileges. Take note of the secret.
Dataiku Cloud Stacks
Simply start new Automation instances.
Dataiku Cloud
You only need to activate your Automation node in the Launchpad > Extension Tab > Add an extension > Automation node.
The installation and setup will be automatically done without needing further actions from you.
Creating Project Deployer Infrastructure
Setting up stages
Each infrastructure belongs to a “lifecycle stage”. This is used to show the deployments per lifecycle stage. DSS comes preconfigured with the classic “Development”, “Test” and “Production” stages but you can freely modify these stages in Administration > Settings > Deployer > Project deployment stages.
Basic configuration
Note
If you are using Dataiku Cloud Stacks, and have enabled fleet management on your virtual network, this is done automatically, you don’t need to do these operations.
On the Project Deployer:
From the home page, go to Project Deployer > Infrastructures
Create a new infrastructure with a unique ID
Enter the Automation node’s base URL (including protocol and port number) and an admin API key secret
Go to the “Settings” tab and grant to some user groups the right to deploy projects to this infrastructure
Repeat for all Automation nodes
Your infrastructure(s) is ready to use, and you can create your first bundle: Creating a bundle
Multi-node infrastructure
Note
An administrator needs to allow the creation of multi-node infrastructures in Admin > Settings > Deployer
For projects with WebApps, such as GenAI Applications, it can be useful to have several instances of the deployed project running in parallel for redundancy. For this use case, you can create specific multi-node project infrastructures. On such infrastructures, you can define two or more automation nodes on which to deploy and monitor a project as a single deployment.
Configuring an Automation infrastructure
Permissions
You can define a group-based security scheme for each infrastructure, to match your internal organization and processes.
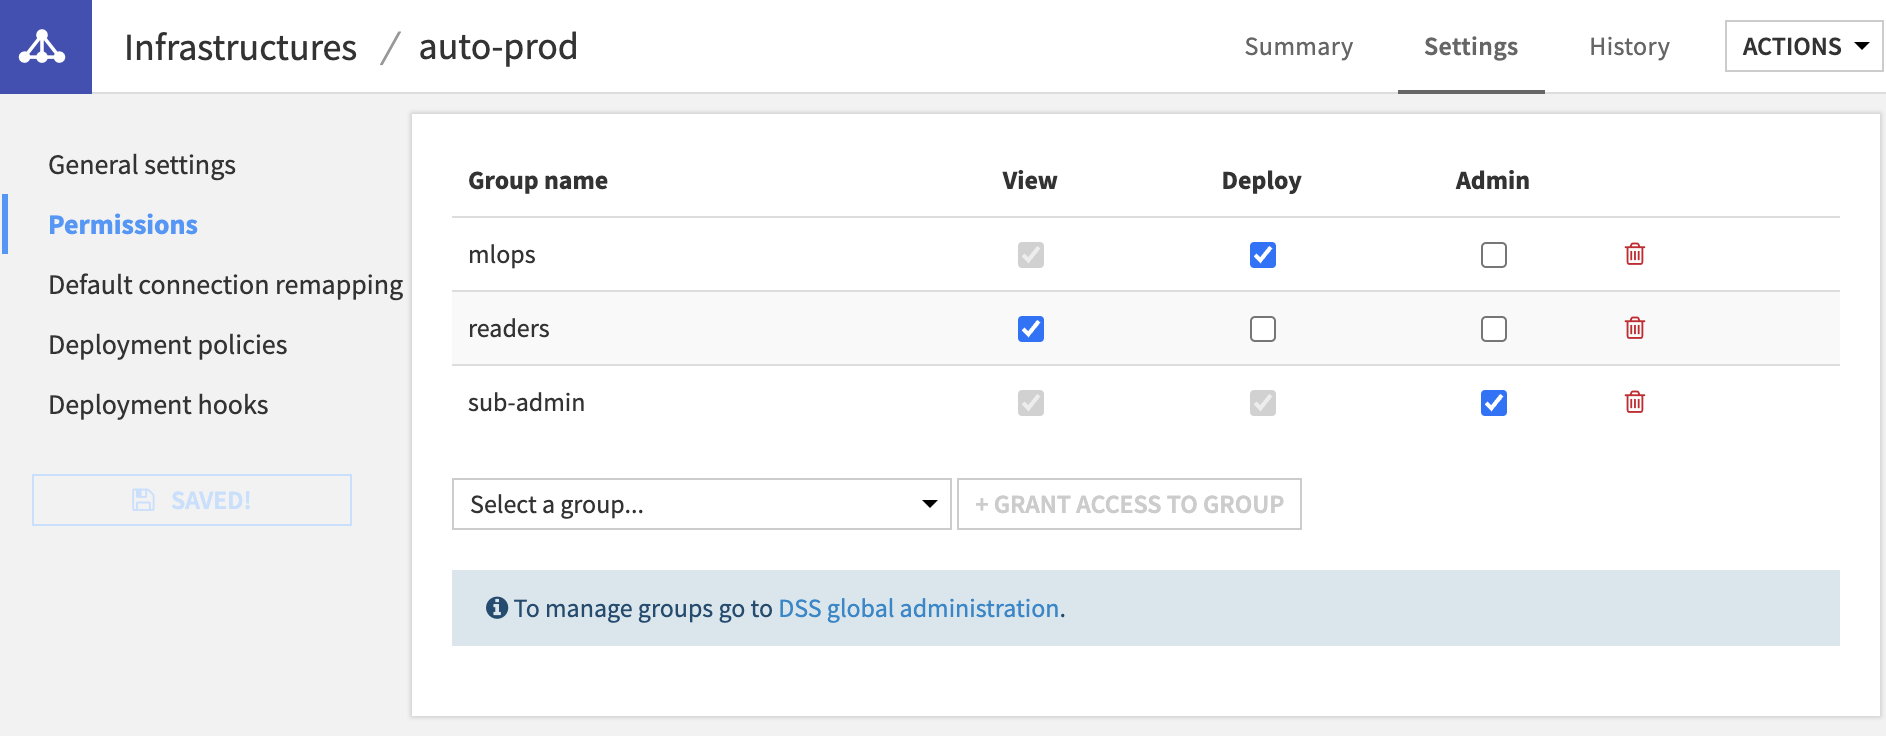
Each user using Project Deployer has access to different set of actions depending on these rights:
if the user is not granted any right, this infrastructure and all its deployments will not even be visible or usable in any way
the View right limits the user’s ability to see deployments and their details in the dashboard
Deploy grants the user the right to create, update or delete deployments on this infrastructure
the Admin right allows the user to see and edit all infrastructure settings
Note
The user security is not only defined by infrastructure but also by project, as defined in the Projects tab. This allows advanced configuration such as allowing all users to deploy any project on a DEV infrastructure but only certain user able to deploy their projects on a PROD infrastructure. You can even restrict the deployment of projects on a production instance to a technical account used by a CI/CD orchestrator through Python API, while keeping users the view rights for Monitoring. You can learn more on this type of setup in our Knowledge Base.
Connection remapping
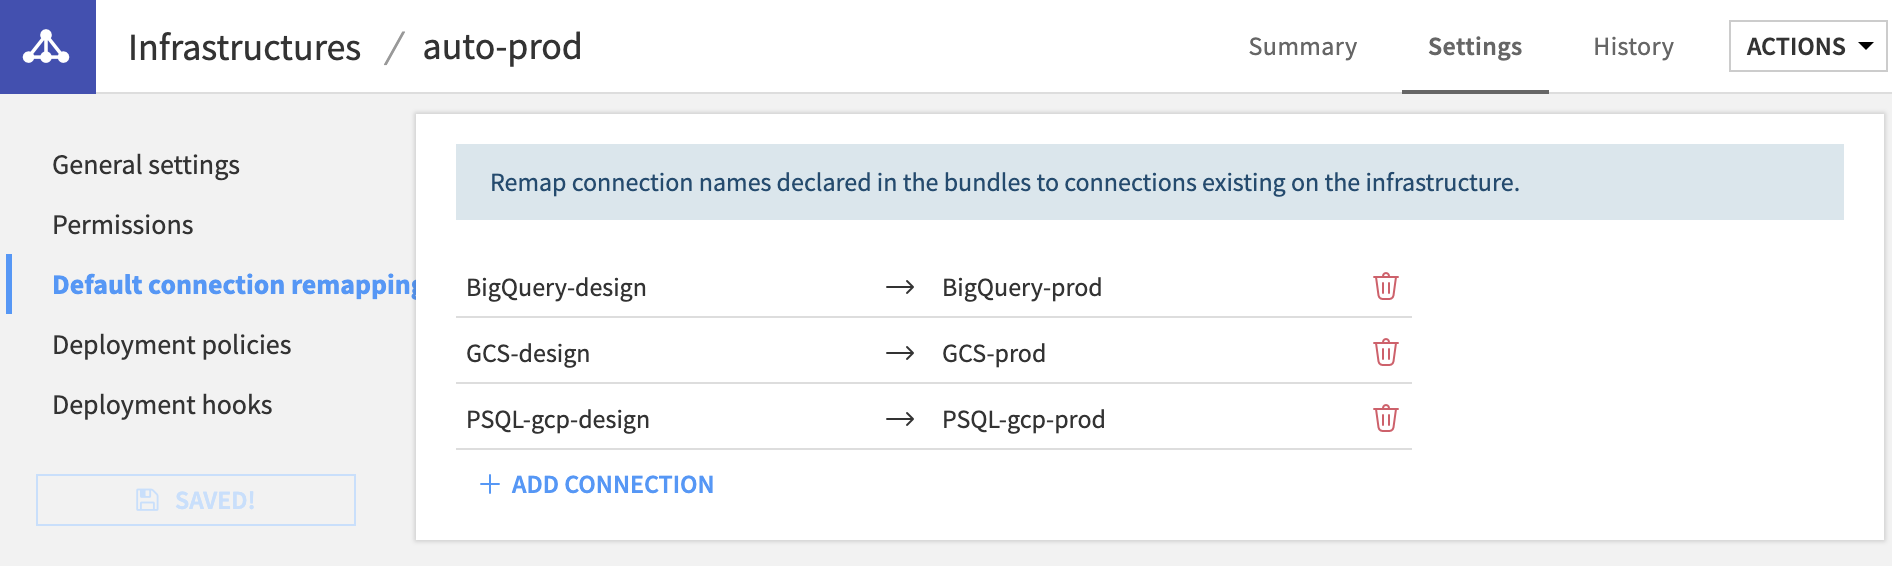
It is very common to store data in different systems between development & production. When deploying a bundle to an Automation node, Project Deployer will match connections by name: if your dataset is based on a connection named db-sql on your Design node, a connection named db-sql is expected to exist on the Automation node for the deployment to succeed. This connection can point to another location, but it needs to be of the same type (FileSystem, S3, GCS, ABLS…).
However, you may want to adopt another strategy with different connections names: connection remappings are used to define such setup. If a connection remapping ‘sql-dev’-> ‘sql-prod’ is configured, upon deployment, Project Deployer will require a connection ‘sql-prod’ and point all its usage to the ‘sql-prod’ connection.
Note
Any change made to this section will only be taken into account for future deployments, not for existing ones. If you need to change existing deployments, you need to do that in the Deployment itself, in its Connections section.
Deployment policies
This section allows you to configure more advanced configuration regarding the user and security of the deployed project.
Permissions propagation
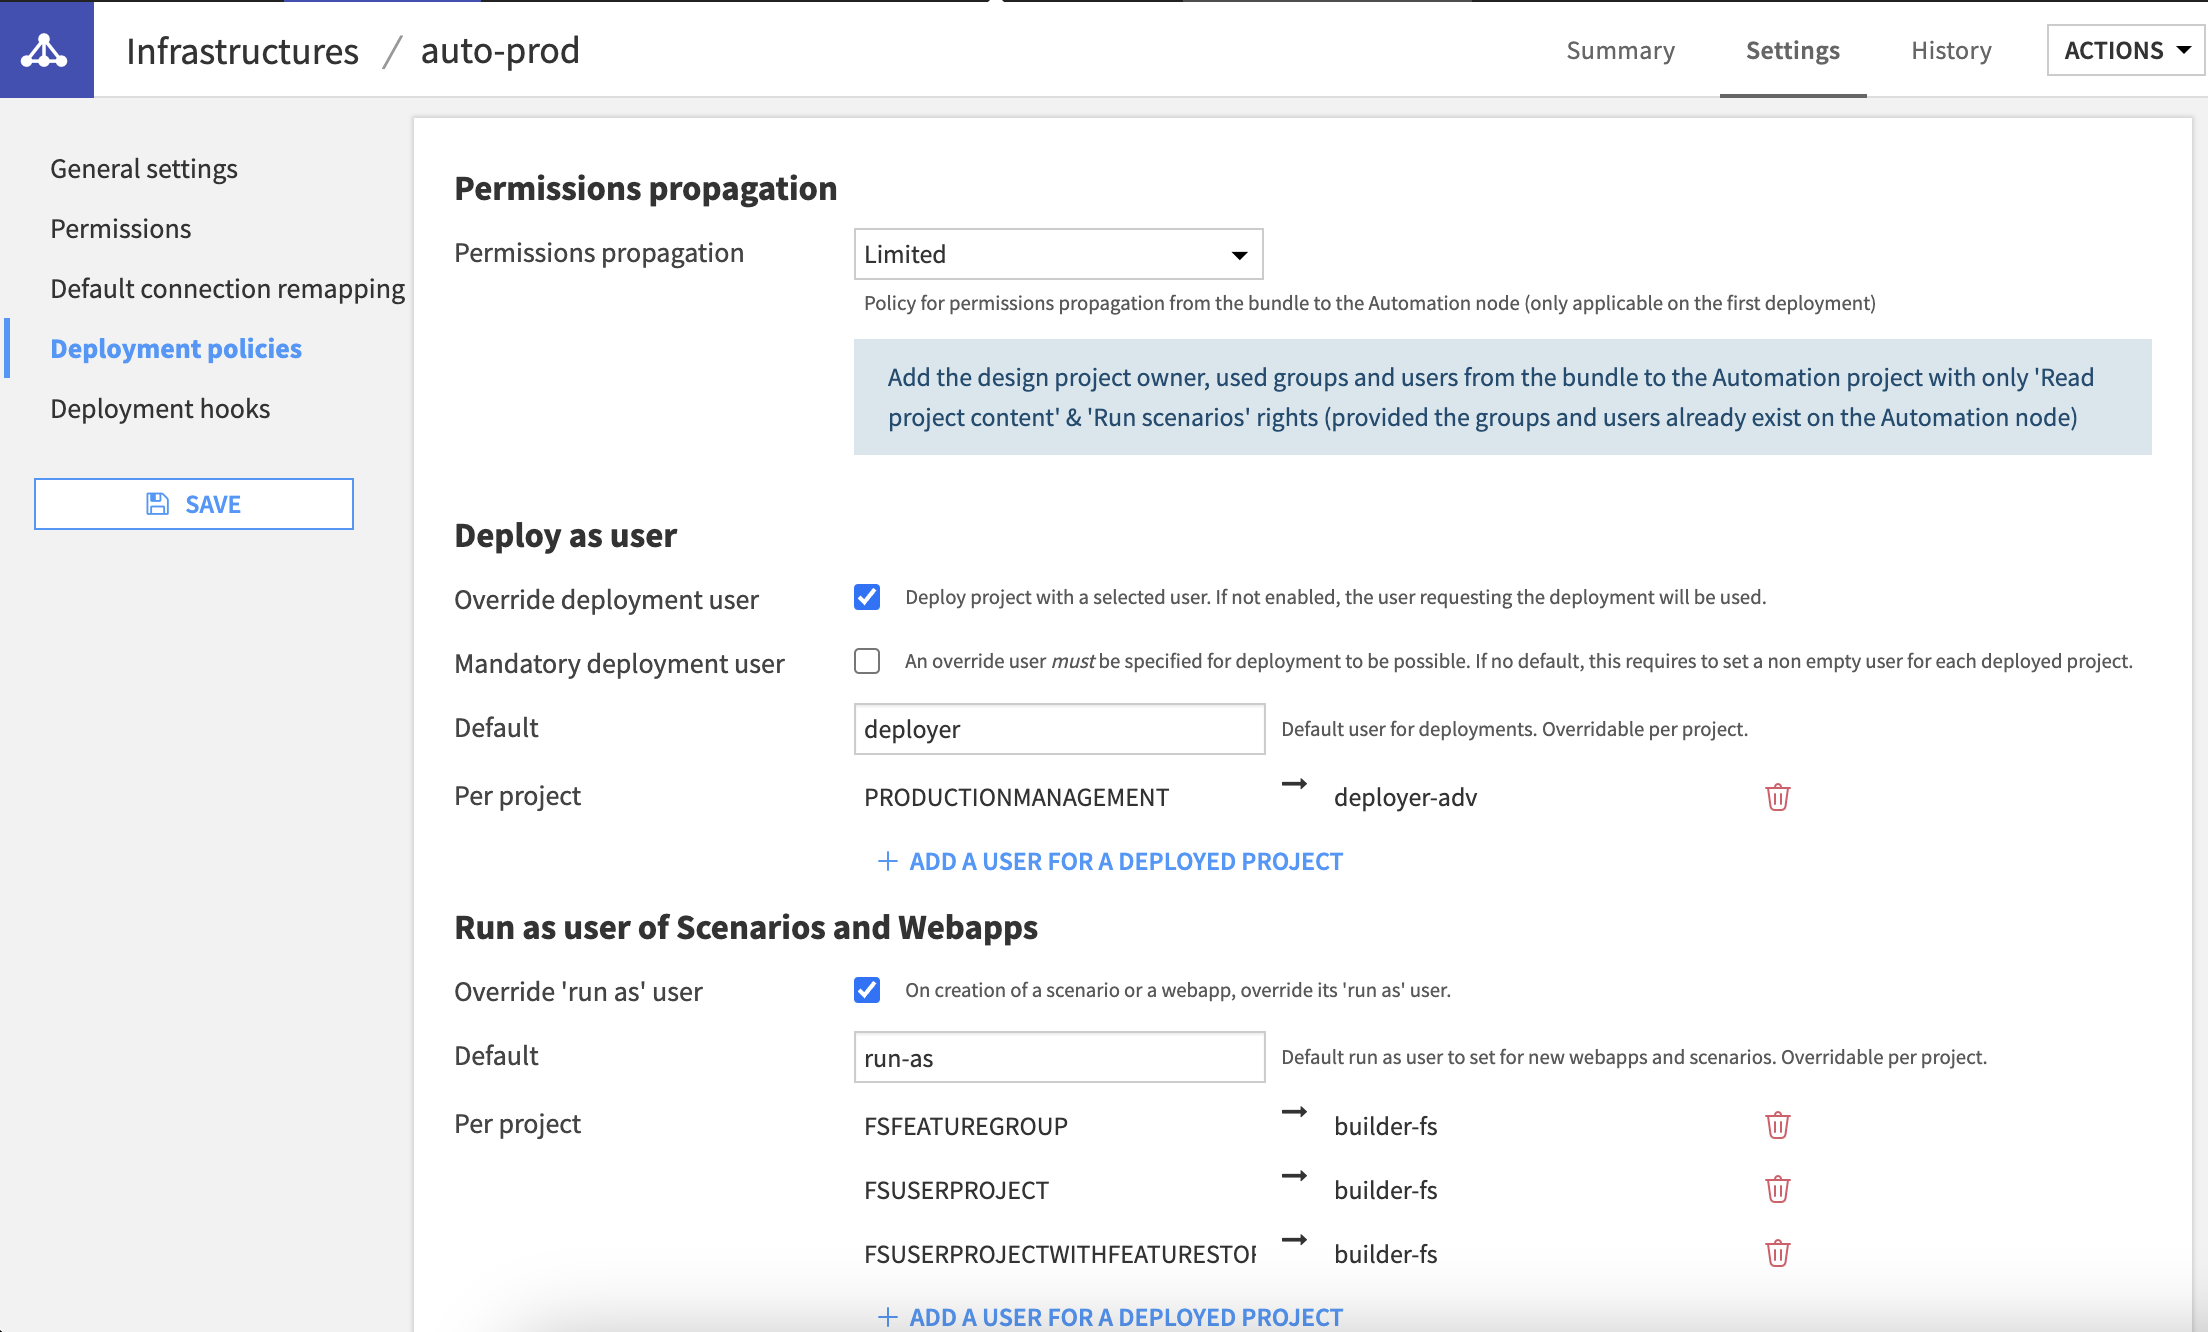
With permissions propagation, you can define the default security scheme of a new project deployed to this automation node.
By default, this is set to None, only the user doing the deployment will be set as Project Owner, no other rights are granted
When set to Limited, all users & groups from the design projects will be set as readers on the deployed project. This setup is meant for controlled deployments where you want your users to deploy, monitor and diagnose projects but not do any actual change directly on the Automation node
The Full option will replicate the design project security scheme on the deployed project. This setup is targeted for fully autonomous teams or for test environments.
Whatever your setup, users or groups will never be created by the deployer, they need to pre-exist. If a user of group does not exist, it will be ignored.
If you are using LDAP logins for your Automation nodes, remember that the default behavior is to import users dynamically from LDAP the first time they connect to DSS (provided that they belong to an authorized group). This import is only done when logging on to the DSS node. Thus, before being able to push services to the Deployer, users will need to log in at least once on the Deployer node.
Deploy as user
As a default, any change made on the Automation node during a deployment is made under the user requesting the deployment, be it from the interface or the Python API. This means that this user needs to be granted enough rights on the this node, at least to create or update projects.
By setting a deployment user, those changes are performed by this specific user, and not the user requesting the deployment. This setup is especially useful in a some production processes where team members are meant to do the deployment but not be able to do any actual change directly on the Automation node.
Run-as user of Scenarios & WebApps
Scenarios and WebApps are specific objects in terms of security as they need to be able to start without an interactive user. This is why they have a specific setup called the run-as user, setup by default to the last editor of the given object.
When moving them into a production environment, this dependency on a named user, potentially changing from one bundle to another, is risky as it can lead to errors or inconsistent behavior on your production processes. The solution is to associate those executions to specific technical users upon deployment, ensuring they will run reliably over time. This is what you can define here: a specific run-as user that the deployer will enforce to all Scenarios & WebApps upon each deployment.
Deployment hooks
Deployment hooks allows you to execute your own set of actions written in Python, pre or post-deployment (available also for API Deployments). They are meant to be used in many contexts such as:
Creating a ticket in a change management tool (e.g. JIRA) containing details on the deployment
Publishing a message on your company slack/Teams when a deployment occurs
Executing a specific scenario on the deployed project on Automation once the deployment is finished
Setting a particular group of users as administrator of the deployed project on Automation
Only Infrastructure administrators can see, edit or delete hooks.
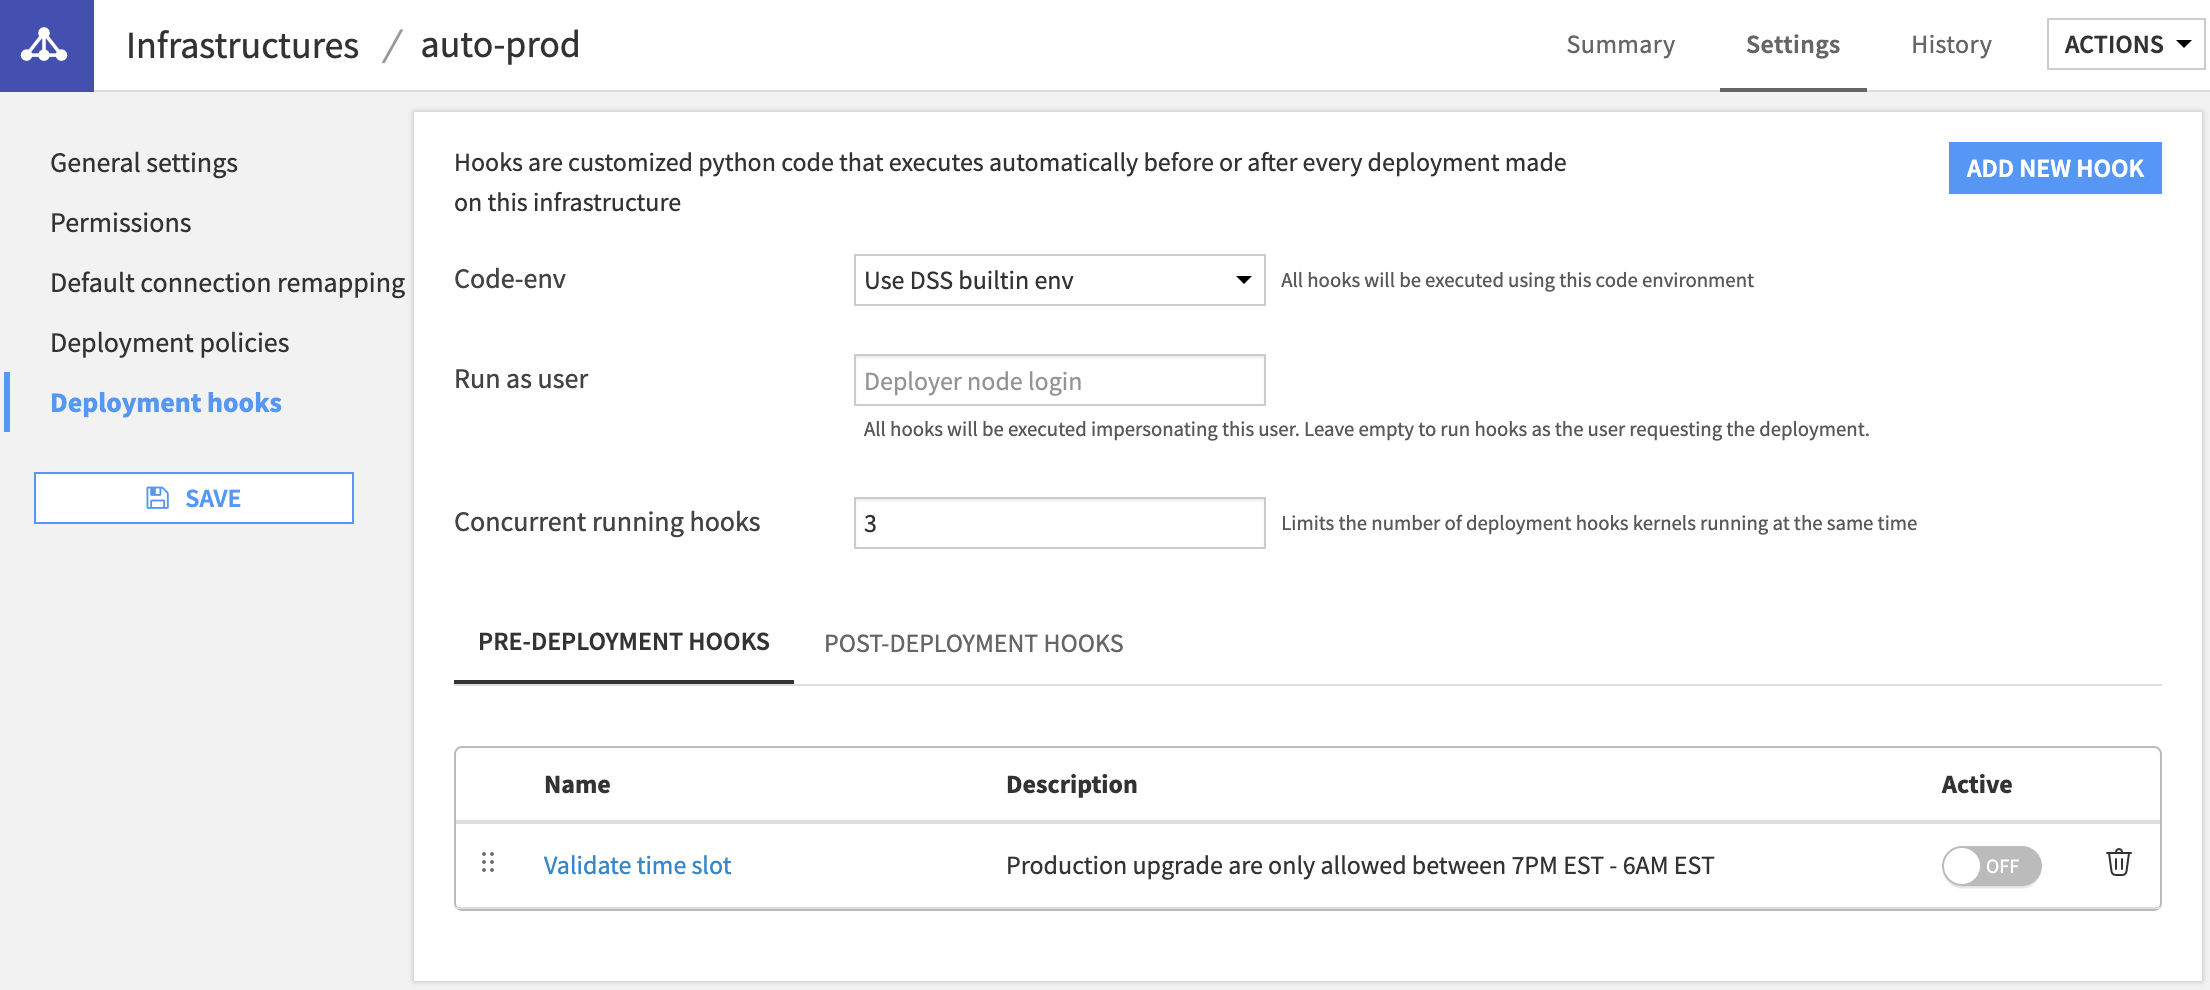
All hooks are executed on the node where the Deployer runs and is using the configured code-env and user.
Since Hooks are consuming resources and take an unknown time to run, there is a default limitation of 3 concurrent hooks running at any given time. If a deployment requires a hook but this limit has been reached, it will wait a maximum of 10 seconds for a pre-deployment hook & 60 seconds for a post-deployment hook. If unable to get an executor, the deployment will fail.