JupyterLab
In this section, we will define a Code Studio template to run JupyterLab in order to interactively edit and debug Python recipes, libraries, …
Create a Code Studio template
In “Administration > Code Studios”, click Create Code Studio template and create a new template named
jupyter-lab-templatein the “Definition” tab, click on Add a block and select
Jupyterlab serverClick Build
In the “General” tab, you can then grant access to some (or all) DSS groups, to control which users is allowed to start JupyterLab runtimes. In their projects, the selected users can now create JupyterLab Code Studios.
Optional JupyterLab extensions
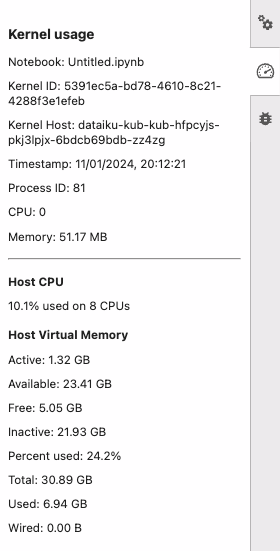
Monitor resource usage
Note
This extension works with the base env of JupyterLab. For more details on this extension, see https://github.com/jupyter-server/jupyter-resource-usage.
In the definition of the “JupyterLab server” block add jupyter-resource-usage<1.0.0 as an additional python module. Then rebuild the template.
This extension displays how much resources your current notebooks uses in a sidebar.

Search and replace
Note
This extension requires the ripgrep package which can be installed by appending RUN yum -y install ripgrep to the Dockerfile. For more details on this extension, see https://github.com/jupyterlab-contrib/search-replace.
In the definition of the “JupyterLab server” block add jupyterlab-search-replace as an additional python module. Then rebuild the template.
This extension let you search across all the content of your synchronized files, notebooks included.
Launch a Code Studio instance
After having built a JupyterLab template, in a project:
ensure the project is associated to a cluster, either by setting a default cluster in “Administration > Settings > Containerized execution” or by setting a cluster for the project in its “Settings > Cluster selection”
in the “Code Studios” section, click New Code Studio, select the
jupyter-lab-templatetemplate, fill a name and create the Code Studioonce in the Code Studio, click Start
After the Code Studio has started, you get access to a Jupyterlab server instance. Work done in the Code Studio will usually materialize as modified files in the container. These would disappear when the Code Studio is stopped, so in order to safekeep them, synchronizing them back to the DSS server’s filesystem is needed, with the Sync files with DSS button.
Edit a recipe
In your JupyterLab file explorer, you will see a folder called “recipes” listing all your DSS project recipes, open one recipe, edit it and then click Sync files with DSS. Now check that the recipe content has been updated in the DSS flow.
Edit Project Libraries
In your JupyterLab file explorer, you will see a folder called “project-lib-versioned”. This folder contains all the files from your project Libraries. You can edit existing files/folders and create new ones. Click Sync files with DSS to save your changes to Dataiku.